Today we are going to create home directory/folder in windows server 2012.
Our sample scenario
AD Server name – server2012.server.world
AD server ip address – 192.168.0.100
client name – Client-1-PC.server.world
client ip address – 192.168.0.102
we have create two users Sam billing and Mathew hayden and both the user are the member of group marketing-users


Step 1 : Create a folder which we can share for the home directory
Step 2 : Right click on the folder and click on properties and then click on sharing then advanced sharing.

Click on “ share this folder” and then provides the “$” sign for the hidden share and then click on permissions

Remove everyone from the permission sections and enter the group name and give then read and write permission

Now add the group and the administrator for sharing


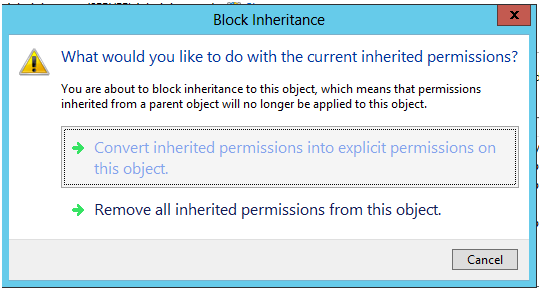
Now go to security then advanced then click on disable inheritence

Then click on converted inherited permission into explicit permission on this object
Now remove the below users
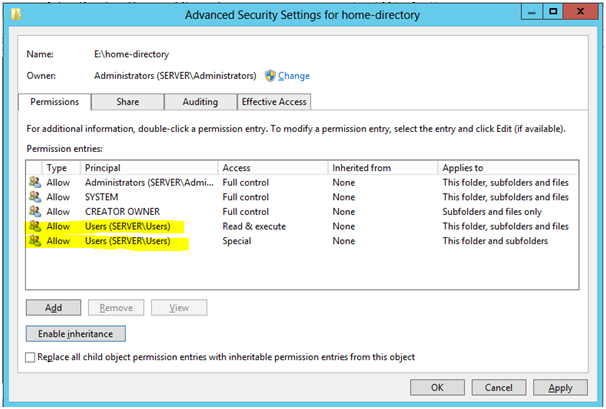
Click on Add to add users

Click on select a principal à add the desired group

And in the applies to section select “this folder only “ and after that click on the “show advanced option” then select the below options


Then click OK
Step 3 : Go to active directory users and computers and then right click on the users and then go to the profile section and then select the Home folder and provide the home directory folder path which we have created in step 1

Click on Apply then OK
Step 4 : Login the client machine with the users (Mathew hayden and sam billings) and if we go to my computer and there we can see our home directory.


